
One of my favorite meal planning breakthroughs came from simplifying dinner routines with Homemade Italian Bread. A few months ago, I faced the typical end-of-week dinnertime scramble. I wanted something comforting, fresh, and versatile without turning my kitchen into a chaos zone. That’s when I carved out time to make Homemade Italian Bread ahead of the busy week. This single batch not only became a staple for dinners but also saved me countless minutes on store runs and last-minute bread buys.
By planning my Homemade Italian Bread early in the week, I reclaimed more than 30 minutes each evening and avoided the stress of forgotten bread or odd substitutions. I divided my time intentionally: prepping the homemade bread dough on a quieter weekend morning, then baking and serving throughout the week. That steady rhythm turned Homemade Italian Bread into a reliable foundation for meals, easing the mental load of daily cooking decisions.
What I love most is how this homemade loaf fits every meal plan: from sandwich bases and side bread to satisfying snacks. Knowing I have Homemade Italian Bread ready means I spend less time scrambling and more time enjoying family dinners. Meal planners aiming for both delicious results and practical time savings will find this traditional Italian loaf a worthy addition.
If you’re looking to add a strategic layer to your cooking schedule with something both tasty and manageable, stay with me as I share my full approach—from ingredient picks to serving tips. Making Homemade Italian Bread part of your routine can be the simple planning edge your week needs.
Your Shopping List:
When I shop for Homemade Italian Bread, I group ingredients to save time and streamline prep. Here’s the essential list:
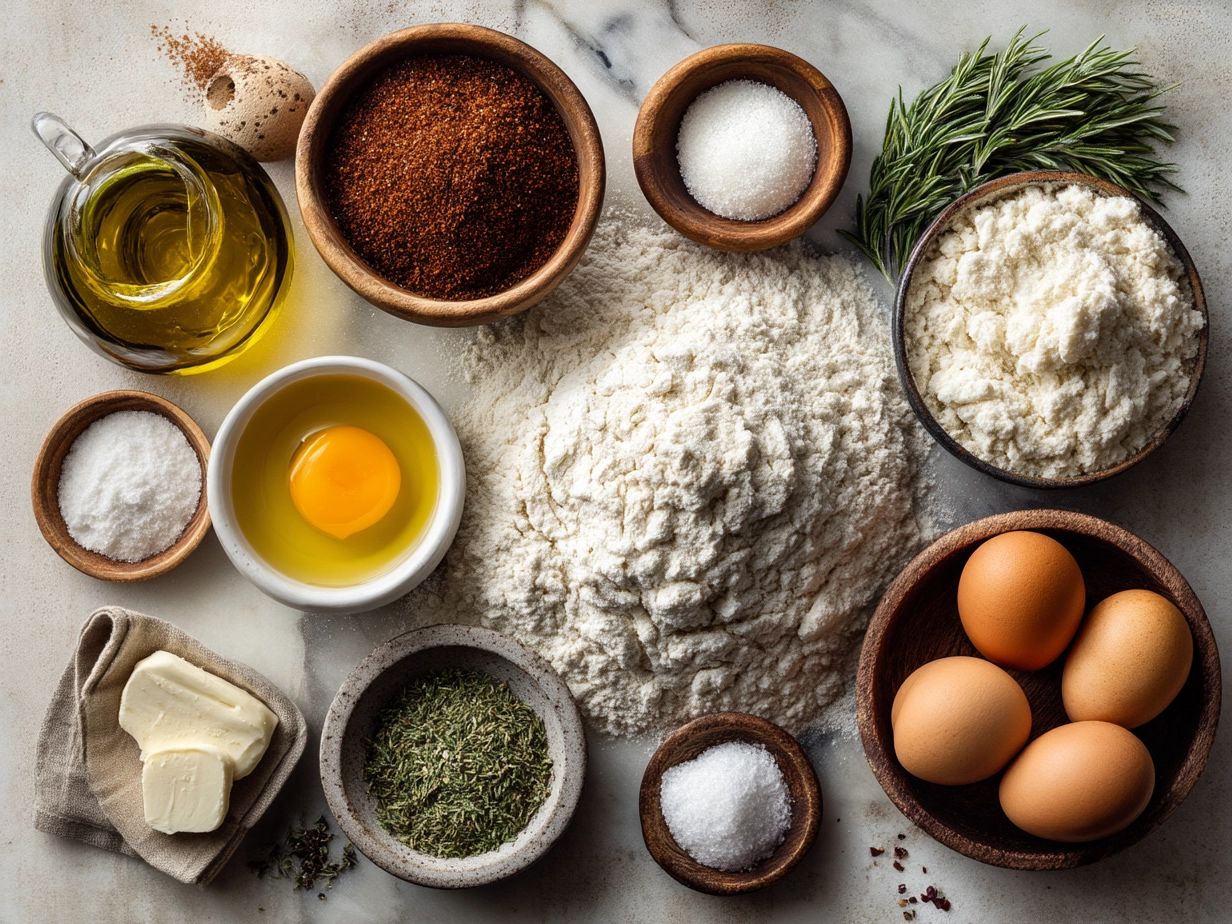
- 4 cups all-purpose flour – chosen for its reliable gluten development and long pantry life
- 1 ½ teaspoons salt – for balanced flavor that carries through all meals
- 1 tablespoon sugar – a little boost for yeast activation that also extends bread shelf life
- 1 packet (2 ¼ teaspoons) active dry yeast – this is the foundation for the homemade bread dough rise
- 1 ½ cups warm water (about 110°F) – helps yeast proof without stressing your timing
- 2 tablespoons olive oil – stores well and adds subtle richness to the crust and crumb
These ingredients aren’t just for Homemade Italian Bread; they often appear in pantry staples like salad dressings, sauté bases, and other baking projects. Buying in bulk or choosing brands that offer pre-measured yeast packets is a smart time-saving approach. For instance, pre-measured yeast saves the guesswork, especially during busy weeks.
Group your flour, yeast, and sugar together in your shopping list—these dry goods often stay on your shelves for months. The olive oil doubles easily for cooking veggies or pans. Salt is a kitchen staple you likely already have, but restocking strategically helps avoid last-minute stops.
Batch prepping your homemade bread dough on the weekend means these ingredients get used efficiently, reducing waste. I always store the dry ingredients in airtight containers to extend freshness, and the olive oil in a cool, dark spot keeps it tasting its best across recipes.
Picking ingredients with shelf life and multi-use in mind allows this Homemade Italian Bread to integrate smoothly into your weekly meal flow. If you want a visual guide, check out this Rustic Italian Crusty Bread Recipe Video from Ciao Florentina—it’s a great way to see the texture you’re aiming for.
The Game Plan:
Making Homemade Italian Bread fits nicely into a busy schedule if you break the process into clear steps. Plan for about 3 hours total from start to finish, mostly hands-off proofing time that lets you focus on prepping other meals.
- Activate the yeast: Combine warm water, sugar, and yeast in a large bowl. Let it sit 5–10 minutes until bubbles form. This step is key for homemade bread dough that rises properly. While that proof’s gently working, you can prep other ingredients for upcoming meals.
- Mix the dough: Stir in flour, salt, and olive oil to form a sticky dough. This rustic homemade bread dough thrives with less fuss, so no need to overwork it. Timing tip: prepping the dough while dinner sides are washing or chopping uses minutes wisely.
- First rise: Cover the bowl and let the dough rise in a warm spot for 1 to 1 ½ hours, until it doubles in size. I set a timer, so I don’t lose track in my meal planning flow. Having a countdown keeps your kitchen rhythm intact.
- Shape the loaf: Lightly flour your work surface and shape the dough into a traditional Italian loaf shape—long and rustic. This doubles as a relaxing break and helps prep your Homemade Italian Bread for the oven stage.
- Second rise: Place your loaf on a parchment-lined baking sheet or in a well-floured proofing basket if you have one. Cover and let rise 30 minutes. Use this window to prep tomorrow’s salad or protein, making efficient use of oven downtime.
- Preheat and score: While your dough rests, preheat your oven to 425°F. Just before baking, slash the loaf’s top with a sharp knife or razor blade to allow steam escape and that signature crispy crust Italian bread texture.
- Bake: Place your bread in the oven, optionally with a pan of water underneath to create steam (this helps the crust stay crisp). Bake 25–30 minutes until golden and hollow-sounding when tapped.
- Cool and store: Let the bread cool completely before slicing. If you’re making ahead, wrap it tightly and store on the counter for up to 2 days or freeze portions for later meals.
If you’re batch cooking, making a double batch and slicing before freezing means you have homemade bread ready whenever you need it. This step is a favorite time-saving trick I’ve relied on throughout busy seasons.
One more planning resource is this detailed Rustic Italian Bread an Easy Recipe that I inherited from For The Feast, which offers additional insights on crust and crumb variations.
The whole process is surprisingly manageable with the right time blocks. While your Homemade Italian Bread bakes, I often prep side dishes or set the table, so nothing feels rushed.
Smart Serving & Meal Planning Ideas:

Integrating Homemade Italian Bread into your weekly meal plan delivers consistent value. It pairs well with everything from soups and salads to hearty Italian dinners.
Plan to serve this traditional Italian loaf alongside pan-fried keto Italian meatballs with marinara sauce for a nutrient-rich weeknight meal that feels indulgent without the fuss. If you want a perfectly paired recipe that fits the same strategic schedule, check out this Keto Italian Meatballs with Marinara Sauce.
For portion planning, one Homemade Italian Bread loaf comfortably serves 4–6 people, with slices that keep well for toast or sandwiches the next day. To avoid waste, slice what you need and freeze leftovers wrapped tightly.
Leftover Homemade Italian Bread can enhance sandwiches, bruschetta, or even meals like pumpkin cornbread with cinnamon honey butter—another versatile pantry staple you can discover here: Pumpkin Cornbread with Cinnamon Honey Butter. This helps rely less on fresh bread every day, easing delivery of meals on tight evenings.
I also use this bread in batch meals for gatherings or quick weekday lunches. It scales easily, so doubling the recipe supports larger families or batch cooking plans.
Switching up how you serve Homemade Italian Bread with different spreads, roasted veggies, or dipping oils keeps it exciting week to week. This approach makes sure it’s never just “bread” but a foundational piece in a well-rounded meal rhythm.
For inspiration on crispy crust Italian bread texture, Espresso and Lime’s Crusty Italian Bread is a fantastic resource with tips to enhance crust quality at home.
Planning & Prep Questions
How far ahead can I prep this Homemade Italian Bread?
You can prepare homemade bread dough up to 24 hours ahead by refrigerating after the first rise. The dough will slow down but continue fermenting, which can improve depth of flavor. Just bring it to room temperature before shaping and second rising.
What’s the best make-ahead strategy for Homemade Italian Bread?
My go-to is making the dough on the weekend, baking the loaf fresh, and freezing sliced portions. Freezing helps maintain the crispy crust Italian bread texture when toasted. You can thaw slices overnight in the fridge or pop them straight into a toaster.
Can I batch cook this Homemade Italian Bread?
Absolutely. Double or triple the dough ingredients, split into multiple loaves, and freeze unbaked dough wrapped tightly. Defrost slowly in the fridge and bake as needed. This helps maintain freshness and avoids daily preparation.
How do I keep the crust crispy if I make this Homemade Italian Bread ahead?
Store bread loosely wrapped in a paper bag or bread box to retain the crust. Avoid plastic wrap, which softens the crispy crust Italian bread texture. Reheat in a warm oven for a few minutes before serving.
How does Homemade Italian Bread fit into a weekly meal plan?
Plan it as a base carb alongside rotating proteins like keto Italian meatballs or roasted chicken. Use leftover slices in sandwiches or quick toast snacks. It’s a versatile staple worth scheduling once per week or every other week for repeat success.
What should I know about scaling this recipe?
This Homemade Italian Bread recipe scales easily by doubling ingredients and shaping multiple traditional Italian loaf shapes. Adjust rise times slightly if working with larger batches, and use timers to stay organized.
Any tips for speeding up the rising process?
Placing dough in a warm, draft-free spot like near a preheating oven or on top of a warm appliance can shave 10-15 minutes off rising times. Just don’t overheat or the yeast will die. This step helps keep your meal plan on track.
Want a video walkthrough? Check out this detailed Rustic Italian Crusty Bread Recipe Video from Ciao Florentina for visual cues on dough texture and shaping.
Planning Takeaways
This Homemade Italian Bread earned a permanent spot in my meal planning system for its ease and dependable deliciousness. It’s a practical solution that streamlines busy weeknights while delivering that rustic Italian bread quality everyone loves.
Strategic Homemade Italian Bread Tips:
– Prepare dough on a weekend morning to use downtime efficiently throughout the week.
– Freeze sliced bread portions to avoid waste and simplify meal assembly.
– Use multi-tasking ingredients from your pantry to keep shopping smart and fast.
Over time, I’ve integrated this bread with meals like keto Italian meatballs, pumpkin cornbread side dishes, and seasonal salads. It adapts easily to both batch cooking and just-in-time meal prep, which makes it well-suited for varying schedules.
It’s particularly good for midweek dinner rotations, freeing up time to focus on protein prep or family routines. You don’t need perfectly rigid systems—just a plan that respects your time and tastes.
I encourage you to adapt this Homemade Italian Bread recipe to your rhythm. Whether you bake once a week or double for leftovers, it makes planned meals less stressful and more satisfying.
Incorporate this homemade loaf into your weekly menu and watch how it simplifies bread decisions and supports your overall cooking success.
For a cozy late-night or holiday twist on baking projects, check out my Gingerbread Men Cookies Best Homemade Recipe for an organized baked goods plan that fits right alongside homemade breads.
Making Homemade Italian Bread part of your meal planning toolbox means you’re choosing efficiency without compromise. You deserve that kind of smart kitchen win.
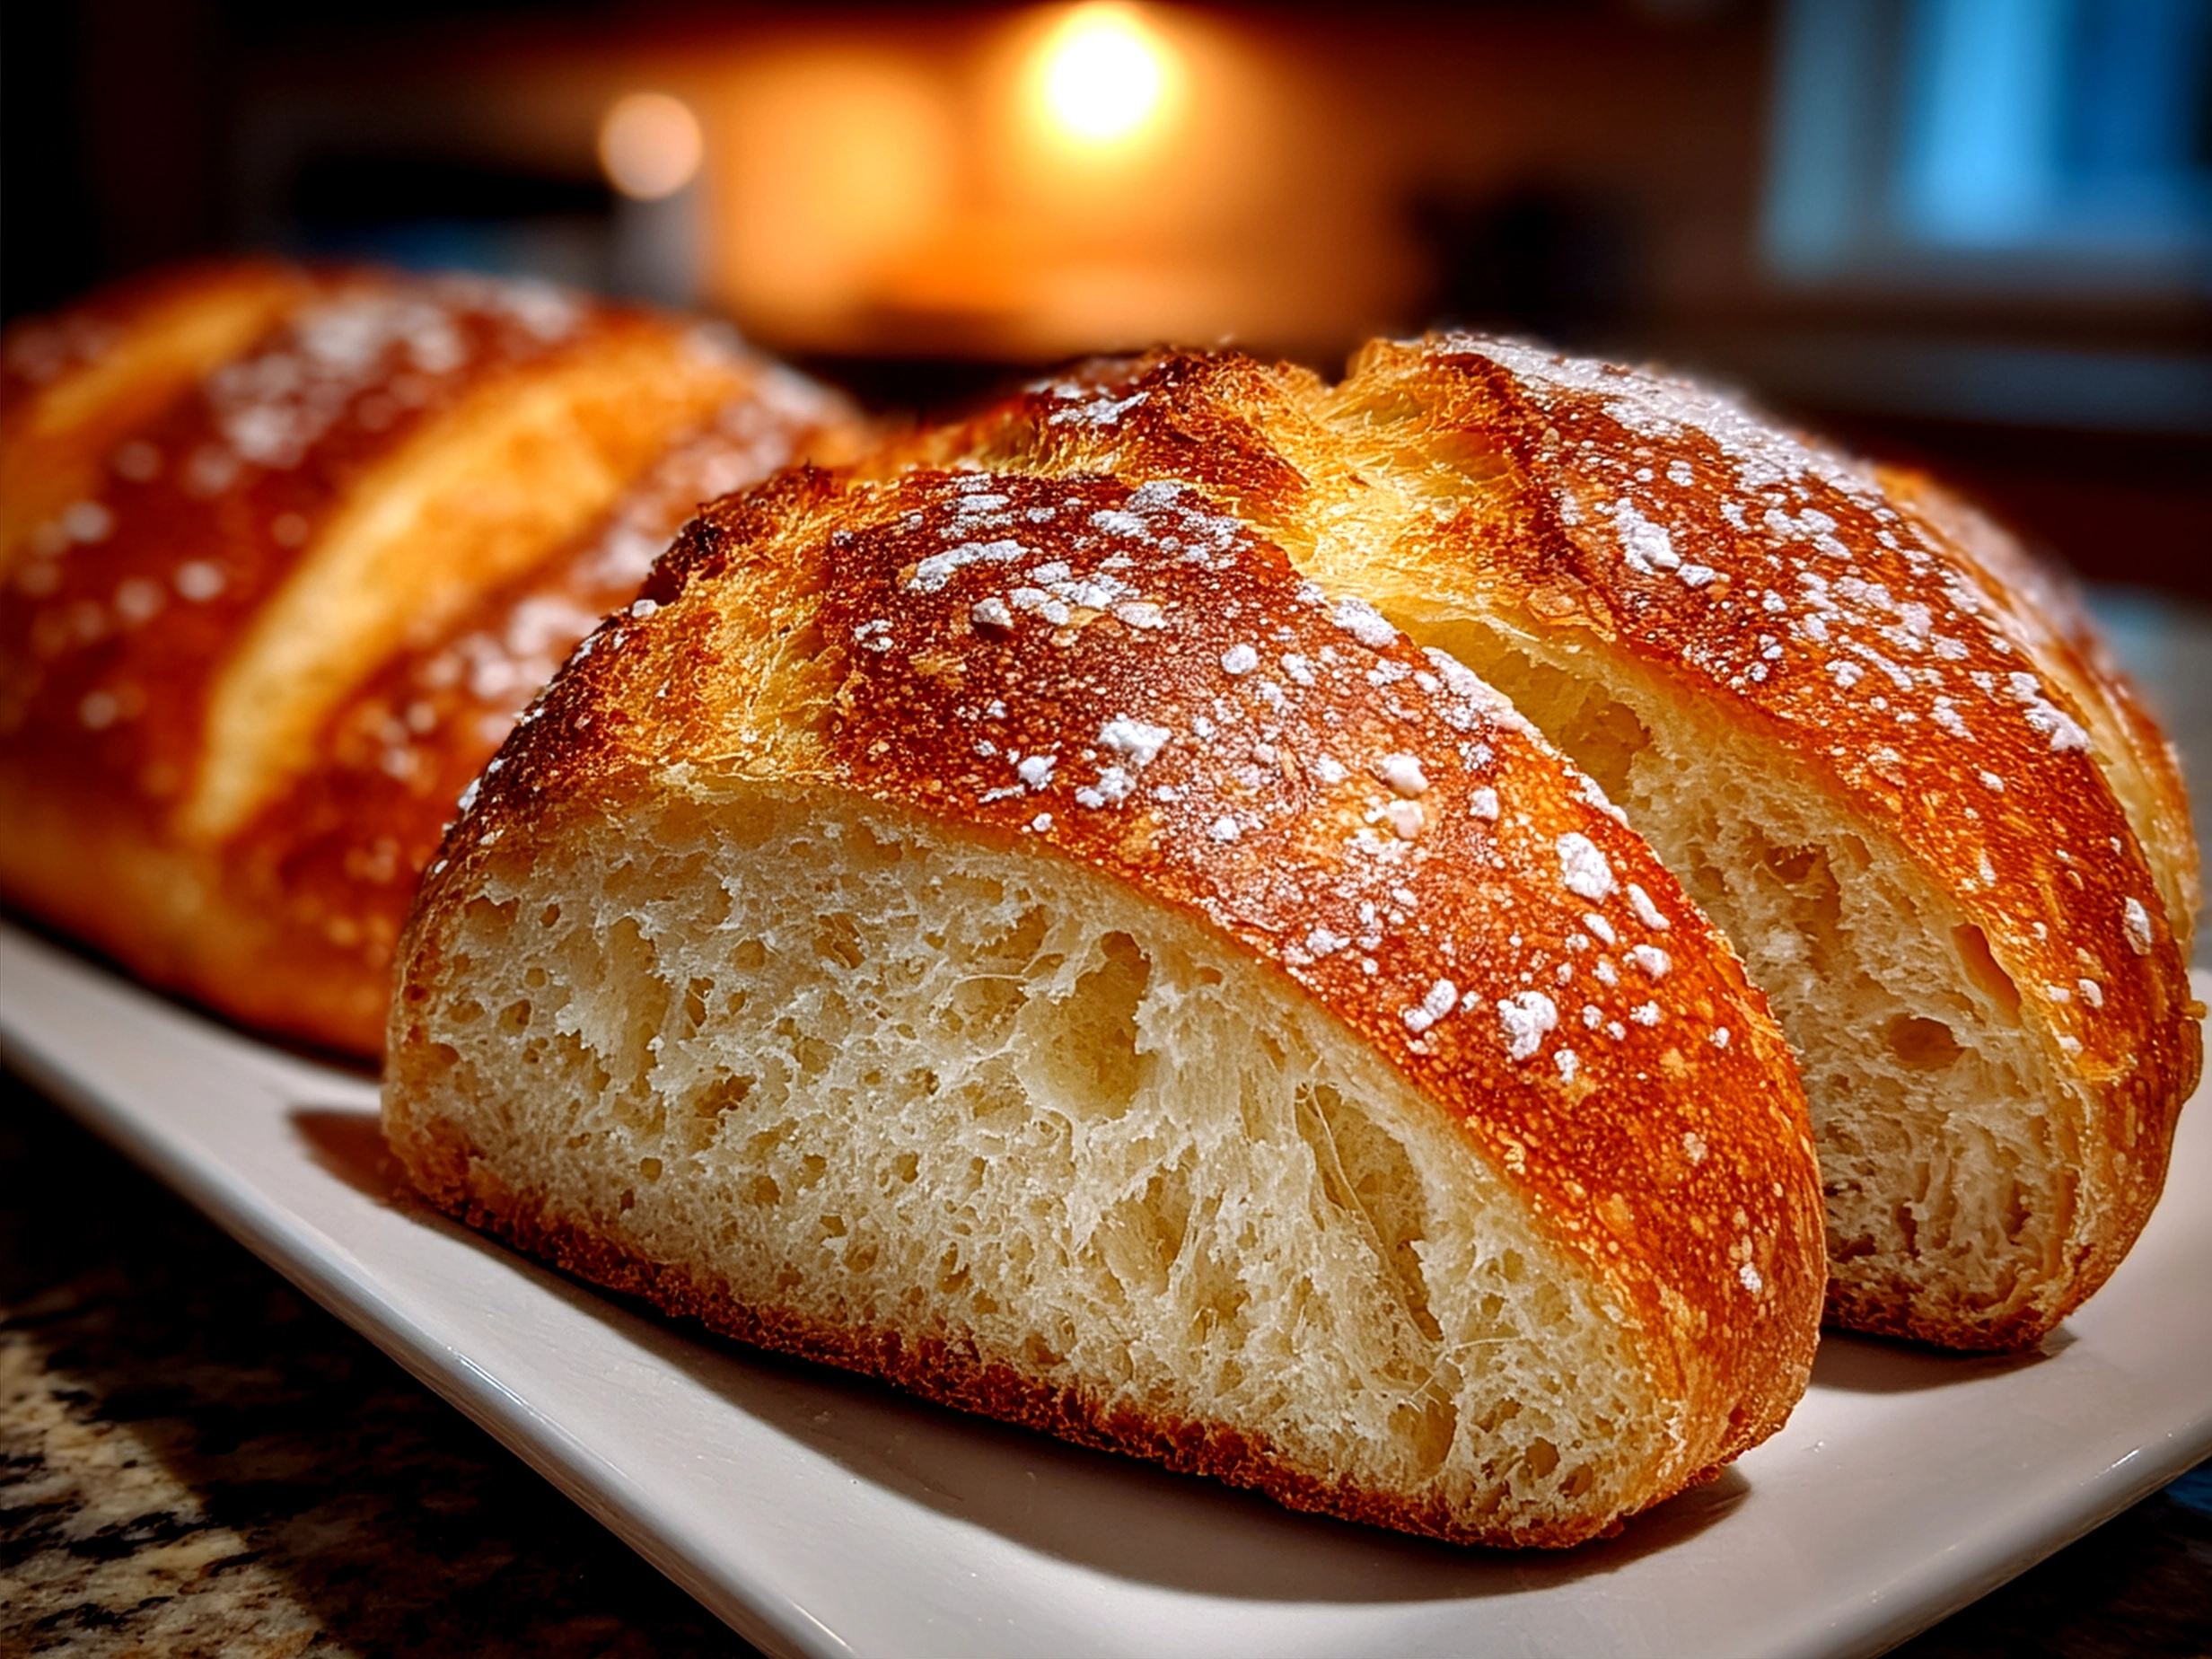
Homemade Italian Bread
This Homemade Italian Bread features a crispy golden crust and a soft, airy interior, perfect for sandwiches or serving alongside your favorite Italian dishes.
- Prep Time: 15 minutes
- Cook Time: 30 minutes
- Total Time: 1 hour 45 minutes
- Yield: 1 large loaf (8 servings)
- Category: Dinner
- Method: Baked
- Cuisine: Italian
Ingredients
- 4 cups all-purpose flour
- 1 1/2 cups warm water (110°F/45°C)
- 1 tablespoon sugar
- 2 teaspoons salt
- 2 1/4 teaspoons active dry yeast (1 packet)
- 2 tablespoons olive oil
Instructions
- In a small bowl, dissolve sugar and yeast in warm water. Let sit for 5-10 minutes until foamy.
- In a large mixing bowl, combine flour and salt.
- Add the yeast mixture and olive oil to the flour. Stir to form a dough.
- Turn dough onto a floured surface and knead for about 8-10 minutes until smooth and elastic.
- Place dough in a greased bowl, cover with a damp cloth, and let rise in a warm place for 1-1.5 hours or until doubled in size.
- Punch down the dough and shape it into a loaf. Place it on a baking sheet lined with parchment paper.
- Cover and let rise for another 30-45 minutes.
- Preheat oven to 400°F (200°C). Make a few slashes on the top of the loaf with a sharp knife.
- Bake for 25-30 minutes until the bread is golden brown and sounds hollow when tapped.
- Let the bread cool on a wire rack before slicing.
Notes
For an extra crunchy crust, place a pan of water in the oven while baking to create steam.