
I recently hit a busy patch where dinners needed to be quick, satisfying, and low-fuss. That’s when I leaned into Easy Yaki Onigiri as a meal planning win. Japanese grilled rice balls might seem simple, but the strategic advantage is how they fit perfectly into a hectic week. With just a bit of prep ahead, I squared away dinners while freeing up precious time for other tasks.
This Easy Yaki Onigiri became my go-to meal because it stores well, reheats easily, and satisfies without the last-minute stress of deciding what to cook. The magic is in the grilled onigiri sauce—simple but flavorful—and the salty-crisp exterior that stays delightful even hours after cooking. It’s very much a weekly staple in my rotation now.
I group my ingredients for the Easy Yaki Onigiri with other Asian-inspired meals, saving corners of my shopping list and pantry for multiple recipes. Planning this ahead meant I had a solid fallback, and prepping a batch of grilled rice balls gave me a no-fuss snack or quick lunch on top of dinner simplicity.
For anyone looking to add an organized, delicious routine with minimal chaos, Easy Yaki Onigiri is a strategic move. If you want meals that fit your real life—not the other way around—this recipe will feel like a breath of fresh air. You’ll find more about how I wedge it into my weekly system as we go along.
Your planning instincts will thank you.
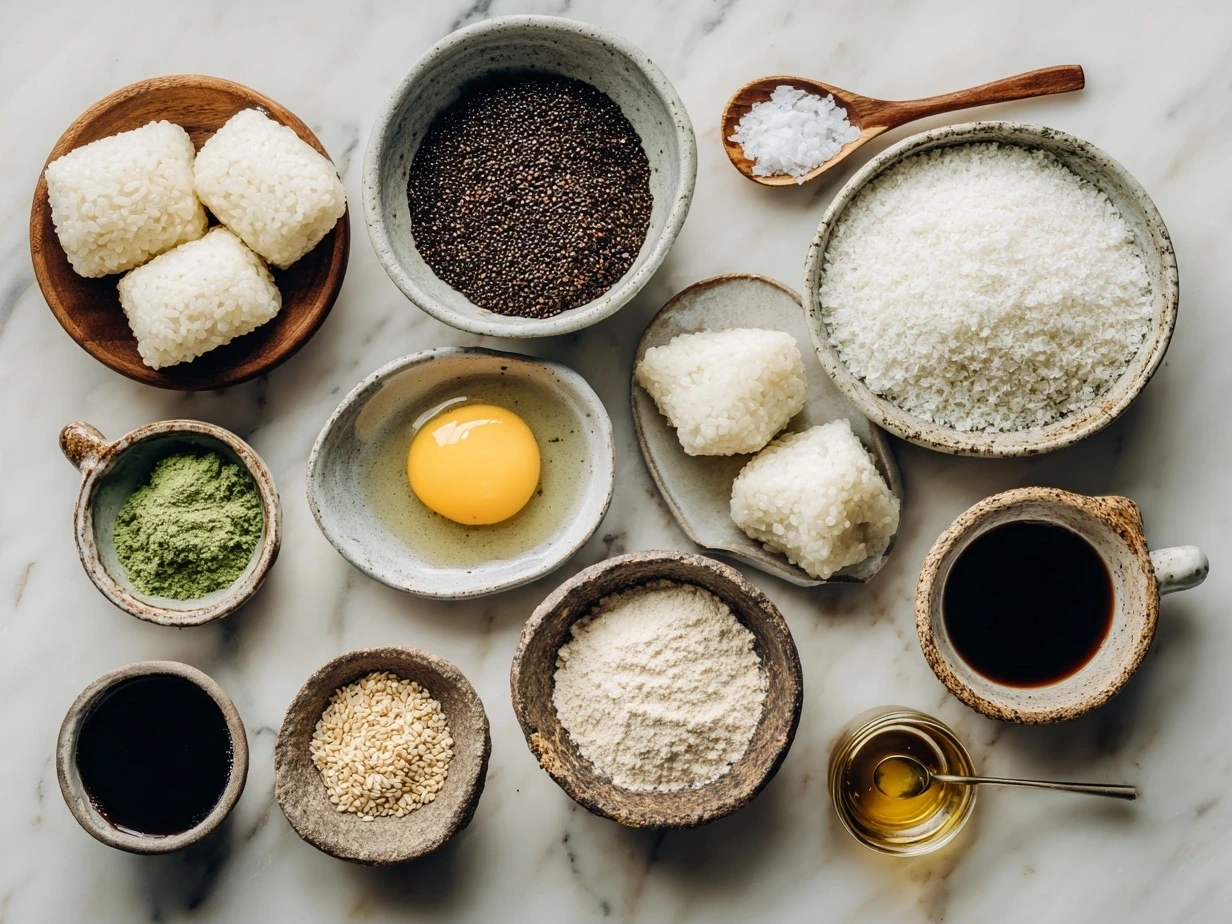
Your Shopping List:
Before hitting the store, here’s what you’ll need for your Easy Yaki Onigiri. I keep these ingredients grouped in the Asian aisle to save time and effort.
- 2 cups Japanese short-grain rice (sticky rice is key for holding the shape and perfect for Easy Yaki Onigiri)
- 2 tablespoons soy sauce (this forms part of the grilled onigiri sauce, store extra for marinade or dipping)
- 1 tablespoon mirin (adds subtle sweetness—choose a brand with longer shelf-life)
- 1 teaspoon sugar (balances flavors in the grilled onigiri sauce)
- 1 tablespoon vegetable oil (for grilling—can substitute neutral oil)
- Optional: sesame seeds or furikake seasoning (adds crunch and flavor, doubles well as a garnish or salad topper)
Why this selection? Japanese short-grain rice not only works for Easy Yaki Onigiri but also shows up in other dishes like sushi rolls or rice bowls you might plan later in the week. Mirin and soy sauce have a good shelf life and are staples, so you’re stocking up for multiple uses, not just this recipe.
If you want a smoother trip through the store, buy pre-cooked rice packs for the Easy Yaki Onigiri, especially if you’re short on prep time. They keep in the fridge for a few days, so you can build your meals around them.
Batch prepping the grilled onigiri sauce is a smart move too. It stores in a small jar in your fridge and works on other grilled proteins or vegetables later in the week.
When storing leftover rice before shaping, keep it covered at room temperature if used within a few hours or refrigerated if longer. This way, your Easy Yaki Onigiri stay fresh and safe without extra fuss.
The Game Plan:
1. Cook your rice: Rinse 2 cups of Japanese short-grain rice under cold water until clear. Combine with 2.5 cups of water in a rice cooker or pot. Plan roughly 30-40 minutes for cooking and resting, as soft, sticky rice is essential for Easy Yaki Onigiri.
2. Prepare the grilled onigiri sauce: In a small bowl, mix 2 tablespoons soy sauce, 1 tablespoon mirin, and 1 teaspoon sugar until sugar dissolves. This sauce will give your Easy Yaki Onigiri that trademark grilled flavor.
3. Shape the rice balls: While the rice is still warm but cool enough to handle, wet your hands to prevent sticking. Form the rice into triangular or oval shapes about the size of your palm. This is where the shape consistency helps with grilling efficiency. Aim for about 6-8 rice balls.
4. Preheat your grill pan or skillet: Brush with 1 tablespoon of vegetable oil. Heat over medium heat. This step is about creating the crisp exterior for those Japanese grilled rice balls.
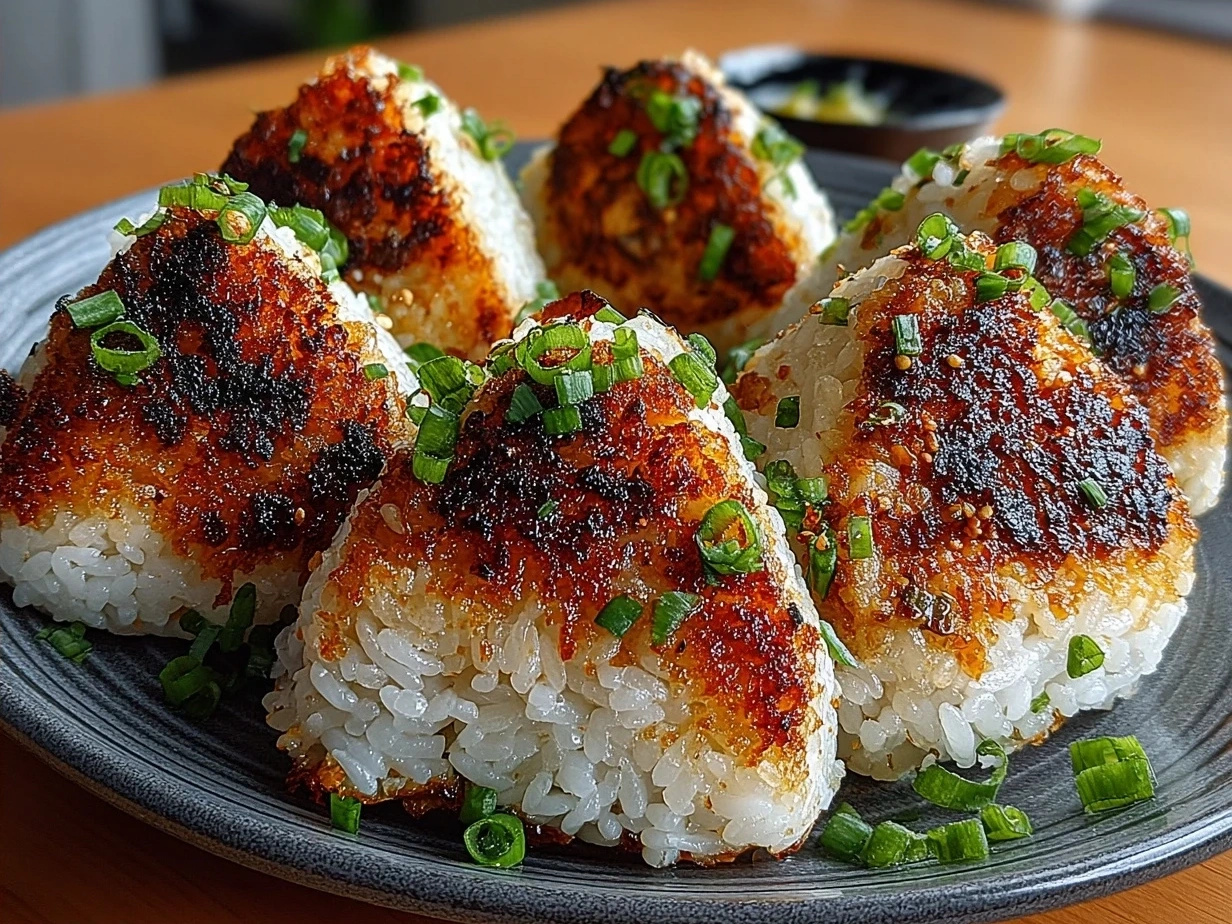
5. Grill the onigiri: Place your rice balls in the pan, cook for about 3-4 minutes on each side until golden brown and crispy. Keep an eye on them to avoid burning.
6. Brush with sauce: Flip the rice balls and brush the grilled onigiri sauce on each side, cooking for another minute or two with sauce to let it caramelize slightly.
7. Serve or store: At this point, your Easy Yaki Onigiri should be perfectly crisp outside and tender inside. If making ahead, allow to cool and then store in an airtight container. Reheat with a quick pan toast or microwave for convenience.
In a full workflow, while your rice cooks, prep your sauce and have hands ready for shaping. Once the onigiri is grilling, clean as you go or prep your next meal components. This type of batch cooking lends itself well to meal planning on Sunday or a quieter evening.
If you want a visual reference, What Great Grandma Ate offers a detailed guide to Yaki Onigiri, perfect to complement your prep.
Smart Serving & Meal Planning Ideas:
Easy Yaki Onigiri is versatile in a weekly meal plan—you can slot it in as a main or a side, depending on how your week shapes up.
Pair it with quick miso soup or steamed veggies for a light, balanced meal. Both sides use ingredients like dashi or seaweed that you might have on hand, supporting smaller, strategic grocery lists. On a busy night, add simple pickles or a salad with leftover sesame seeds from your Yaki Onigiri prep.
Portion planning is important here. If you’re cooking for two, make extra to stash in the fridge or freezer. These easy Japanese snacks reheat well and can become a lunchbox item or breakfast addition.
Plan leftovers creatively: crumbled Yaki Onigiri on top of stir-fry or chopped into soups gives an exciting texture without extra effort.
For variety across the week, try a batch with furikake seasoning one day and a soy-sesame glaze on another. You can scale up based on how many meals you want this to cover.
If you want more ideas on how this fits into a meal planning strategy, the Okonomi Kitchen site has a great Yaki Onigiri (Grilled Rice Balls) post that I often refer to.
Planning & Prep Questions
How far ahead can I prep this Easy Yaki Onigiri?
You can prepare Yaki Onigiri up to two days ahead if refrigerated in an airtight container. For longer storage, freeze them individually wrapped to keep shape and texture intact.
What’s the best make-ahead strategy for Easy Yaki Onigiri?
Cook rice and shape the onigiri the day before. Grill and brush the sauce just before eating to keep crispness fresh. Pre-make the grilled onigiri sauce and store it ready to go. This time-saving approach fits neatly into a Sunday prep routine.
How do I incorporate this Easy Yaki Onigiri into my weekly meal plan?
Treat it as both a main or side dish depending on your schedule. It complements quick soups or stir-fries and works well on heavy cooking nights where you need a low-effort option. Plan it on busy weekdays or prep it as a backup for unpredictable evenings.
Can I customize the grilled onigiri sauce?
Absolutely. Adjust the soy sauce and sugar ratio to your taste or add a pinch of chili flakes to spice up your Easy Yaki Onigiri. Having a sauce base you can tweak always keeps your meals interesting.
Is batch cooking Easy Yaki Onigiri worth it?
Yes. I find making a larger batch efficient, especially when I have extra rice from previous meals. Batch cooking lets me freeze portions for quick meals later, reducing nightly cooking pressure.
How do I keep the rice from sticking to my hands when shaping?
Wet your hands lightly with water and a pinch of salt before shaping each rice ball. This simple step cuts down on mess and helps maintain the integrity of your Easy Yaki Onigiri shapes.
What cooking tool works best for grilling?
A non-stick grill pan or cast-iron skillet works best. It gives even heat and that nice char on your Yaki Onigiri. If you want to go traditional, a broiler or outdoor grill also works beautifully.
If you want community-tested tips, the Reddit JapaneseFood discussions on Crispy Yaki Onigiri are a great resource.
Planning Takeaways
Easy Yaki Onigiri is a winner in my meal planning rotation because it balances simplicity with flavor and stores well. It stands out as a weekly staple that fits into busy schedules without extra fuss.
- Prepare rice and shape in advance but grill just before serving to keep crispness optimal.
- Stock grilled onigiri sauce separately for multiple uses throughout the week.
- Use batch cooking to freeze extras and reduce evening cooking stress.
I’ve tried variations from simple soy glaze to sesame and furikake toppings, adapting to the week’s meal plan. My best weeks start by setting aside time for this dish’s prep on Sunday or midweek when time opens up.
For busy weeks, planning Easy Yaki Onigiri as a go-to meal gives you reliable, tasty dinner options and leftover-friendly lunches. Adjust the recipe rhythm to your schedule—it’s flexible and forgiving.
To dive deeper into how this recipe fits planned cooking, check out reliable references from What Great Grandma Ate, Okonomi Kitchen, and community insights on Reddit.
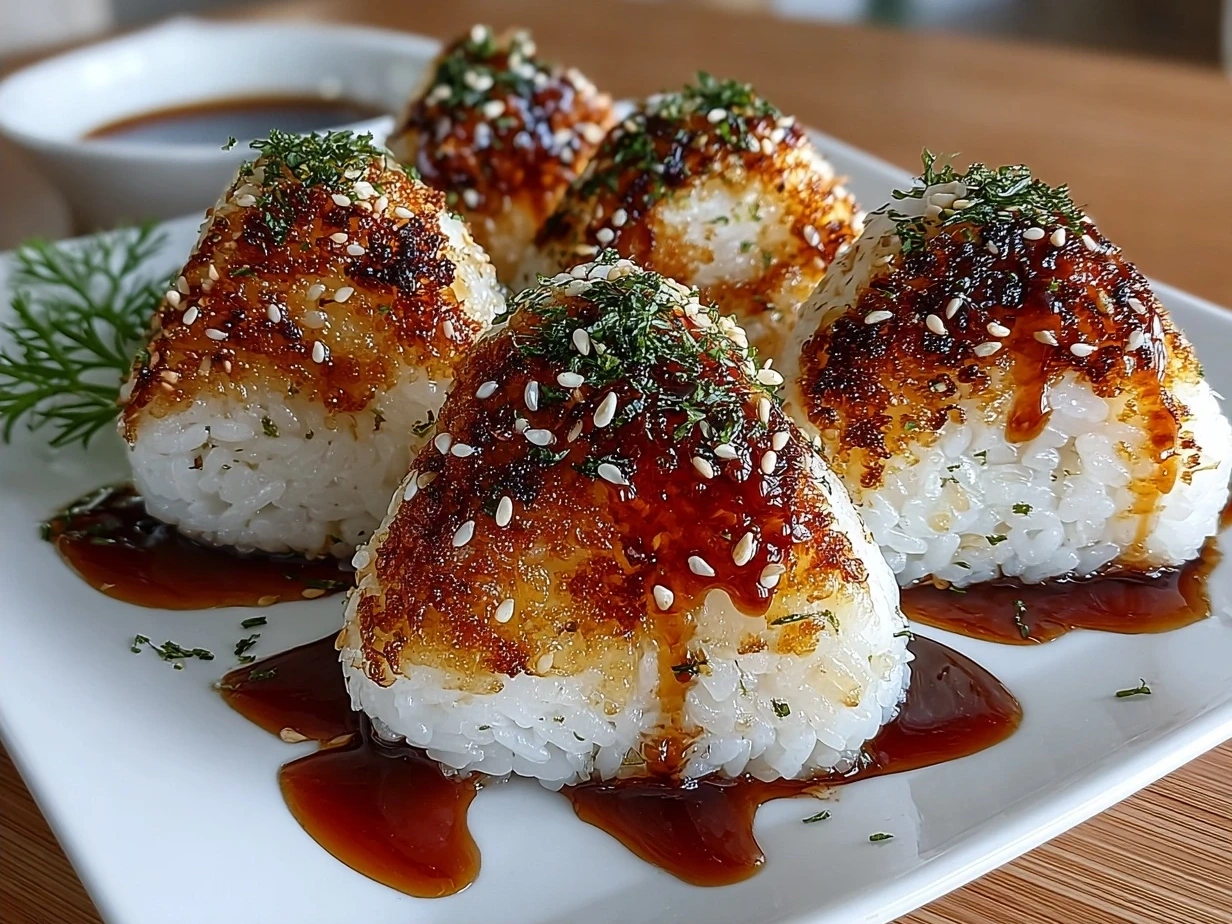
Easy Yaki Onigiri
Enjoy this simple yet flavorful Easy Yaki Onigiri recipe, featuring crispy grilled rice balls brushed with savory soy sauce—perfect as a snack or side dish.
- Prep Time: 10 minutes
- Cook Time: 10 minutes
- Total Time: 20 minutes
- Yield: 4 servings
- Category: Snack
- Method: Grilled
- Cuisine: Japanese
Ingredients
- 2 cups cooked Japanese short-grain rice, slightly cooled
- 2 tablespoons soy sauce
- 1 tablespoon mirin (optional)
- 1 tablespoon vegetable oil or sesame oil
- 1 tablespoon white sesame seeds (optional)
Instructions
- Wet your hands with water to prevent sticking and shape the cooked rice into firm triangular or round balls.
- Heat the oil in a non-stick skillet over medium heat.
- Place the rice balls in the skillet and cook until the bottom is golden and crispy, about 3-4 minutes.
- Carefully flip the rice balls and cook the other side until similarly crispy.
- Mix the soy sauce and mirin in a small bowl and brush the mixture over all sides of the rice balls in the skillet.
- Cook for another 1-2 minutes, allowing the sauce to caramelize slightly.
- Remove from heat, sprinkle with sesame seeds if desired, and serve warm.
Notes
For extra flavor, stuff the center of each onigiri with a small amount of pickled plum (umeboshi) or cooked salmon before shaping.