
When I first added Marshmallow Snowman Treats to my holiday lineup, they quickly became a time-saving victory during one of my busiest weeks. I remember juggling full workdays, evening events, and a household craving festive sweets without the last-minute chaos. Planning ahead, I prepped the base of these winter marshmallow treats early on Sunday while also prepping breakfast and snacks for the week. Those little marshmallow snowmen weren’t just adorable winter marshmallow treats—they were strategic tools that saved me at least 30 minutes daily from frantic dessert runs or quick snack fixes.
I love fitting Marshmallow Snowman Treats into an organized meal plan because they combine quick assembly with a comforting treat your family actually looks forward to. Most importantly, they aren’t just a festive snack; they fit into a batch prep system that reduces kitchen stress. By prepping certain ingredients ahead, like chocolate-dipped buttons or marshmallow mix-ins, you spend less time during the week assembling these treats. The strategic choice of long-lasting ingredients means you’re always a step ahead.
If your schedule feels tight, I want you to know this is exactly the kind of holiday marshmallow snack that rewards thoughtful planning. Once you have your system in place, making Marshmallow Snowman Treats becomes a simple and consistent win rather than a last-minute scramble. For planners who want to enjoy festive snowman desserts without fuss or chaos, this recipe is worth stitching into your routine. I’ll walk you through both ingredients and timing that make these treats work efficiently alongside your holiday meal schedule. Plus, if you’re interested in kids’ snowman food crafts, check out this fun edible snowman craft for kids birthday party shared by others for creative inspiration.
Your busy weeks become more manageable when these winter marshmallow treats arrive right when you need them. Ready to see how I break down shopping, prep, and serving suggestions for Marshmallow Snowman Treats? Let’s dig in.
Your Shopping List:
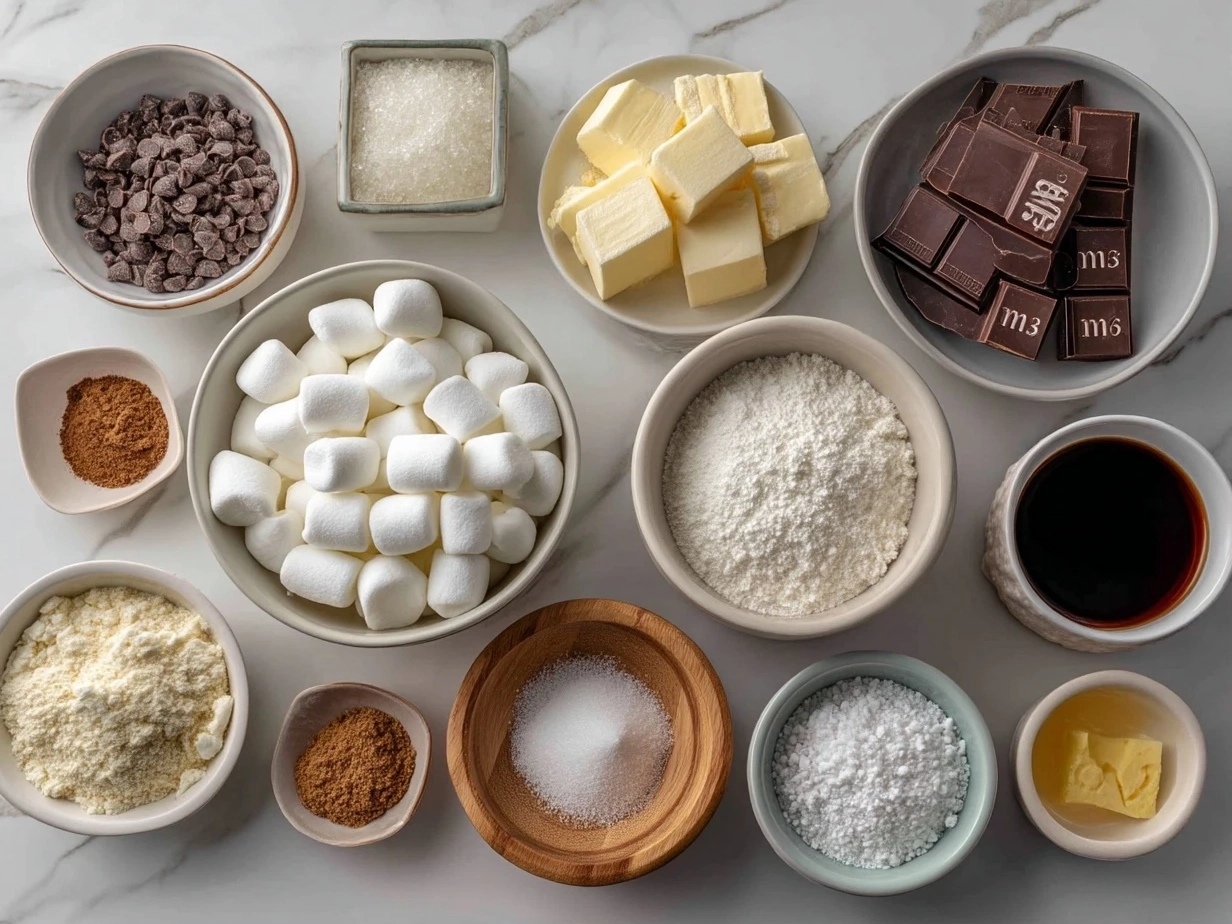
- 20 large marshmallows (standard size): I pick these because marshmallows store well in sealed bags for weeks and won’t lose freshness. They make the perfect canvas for my Marshmallow Snowman Treats.
- 1/2 cup white chocolate chips: These melt smoothly for dipping and add a creamy base to the snowman look. I often buy this pre-chopped to save prep time during my Marshmallow Snowman Treats assembly.
- 10 mini chocolate chips: Used as eyes and buttons. They keep well and double as decoration in other treats, making them efficient buys any week.
- Orange candy corn (about 20 pieces): The perfect nose pieces for snowman noses. These last long in a sealed container and can be used for other easy Christmas snacks too.
- Colored icing tubes (black and red, small tubes): These add fine details like scarves and mouths. I like buying these whole tubes since I use them for other festive snowman desserts throughout the season.
- Pretzel sticks (15 sticks): Used for arms. Pretzels stay fresh in a sealed container and add a crisp contrast in texture. I usually add these to snack bags prepping for the week, so they double their use.
- Sprinkles (optional, small jar): Holiday-themed sprinkles add extra festive flair. They store practically forever and pop up in many snowman food crafts.
Group these ingredients together at the store in the baking and candy aisles. Keeping your Marshmallow Snowman Treats shopping list portioned helps avoid backtracking in the store. These ingredients aren’t just for this recipe; they appear in other easy Christmas snacks I make throughout December, which makes this a strategic buy.
If you’ve got a batch plan, order extras of chocolate chips and marshmallows—they freeze well for a couple of months, so no worries about shelf life. Keep icing in the fridge once opened, though it usually lasts weeks refrigerated. Buy pre-cut pretzel sticks or pre-washed candy corn to save prep time. This level of ingredient organization makes assembling Marshmallow Snowman Treats more approachable for busy cooks.
The Game Plan:
- Prep your workspace and ingredients first to ensure smooth workflow for Marshmallow Snowman Treats. Lay out marshmallows, mini chocolate chips, candy corn, pretzel sticks, and icing tubes within arm’s reach. This organized step saves scrambling mid-assembly.
- Melt the white chocolate chips in a microwave-safe bowl, heating in 20-second bursts while stirring between to prevent burning. This should take around 2-3 minutes total. Plan for about 15-20 minutes from prep to table with this Marshmallow Snowman Treats treat.
- Dip marshmallows into the melted white chocolate — only halfway or fully depending on your preferred snowman design. Place on parchment paper to harden. This chocolate shell adds structure and a nice chilly look. If you’re making this ahead, let the coated marshmallows cool completely and store in an airtight container.
- While the chocolate cools, use mini chocolate chips for eyes and buttons by pressing gently into marshmallows. Hold steady for a moment to set. This is where your precision saves trouble down the line—getting these details right early means you avoid fixes later.
- Attach a candy corn piece as the nose in the center of the marshmallow face using a small dab of icing. Similarly, use icing to draw smiles or scarves with black and red icing tubes. A small piping tip helps with fine details. If you’re prepping Marshmallow Snowman Treats in bulk, you can divide this decorating step over multiple days.
- Insert pretzel sticks on marshmallow sides to create arms. These give your snowman character and add crunch contrast. Be gentle to avoid breaking pretzels or marshmallows.
- Add sprinkles or extra festive touches while icing is still wet, if desired. This is a fun way to customize for holiday parties or school snowman food crafts.
Batch prep tip: You can make multiple marshmallows coated and decorated, store them layered between parchment paper, and refrigerate. When ready to serve, bring to room temperature for best texture and flavor. Freezer storage is possible wrapped tightly for up to 2 weeks; thaw slowly to avoid condensation on marshmallow surfaces.
As a repeat meal planner, I set a checkpoint once marshmallow coating hardens—this lets me space out decorating to avoid feeling rushed. While Marshmallow Snowman Treats cool, I prep tomorrow’s snack bags or pack school lunches. This overlapping workflow turns small tasks into a smooth routine.
Smart Serving & Meal Planning Ideas:
Marshmallow Snowman Treats fit perfectly in a weekly rotation alongside other easy Christmas snacks like the Easy Grinch Fruit Kabobs for the holidays from Amee’s Savory Dish. Pair these treats with fresh fruit or light chicken dinner leftovers for a relaxed holiday evening. When planning portion sizes, count one to two snowmen per child-sized serving, balancing sweetness with other winter marshmallow treats or savory snacks.
These Marshmallow Snowman Treats shine as a dessert or festive treat for holiday parties, school events, or family movie nights. Planning these for midweek celebrations breaks up the routine and adds excitement. Leftovers work well wrapped individually in cling wrap or small containers, making them a grab-and-go snack for busy mornings or car rides.
For larger holiday spreads, use Marshmallow Snowman Treats alongside other snowman food crafts like the edible snowman craft for kids birthday party or this charming Marshmallow snowman made with chocolate. These options create thematic connections in your menu without too much overlap.
Scaling up is easy: simply multiply your shopping list by guests and pre-portion supplies in reusable containers. Planning variations include swapping white chocolate for dark or adding peppermint extract to the coating for seasonal flavor shifts. You can schedule quick prep sessions in your week with this Marshmallow Snowman Treats to stay ahead while keeping recipes fresh.
Planning & Prep Questions
Q1: How far ahead can I prep this Marshmallow Snowman Treats?
A1: You can prep the marshmallows dipped in white chocolate and store them refrigerated for up to 3 days. Decorations are best added the day of serving to maintain shape and freshness. For longer storage, freeze fully assembled snowmen tightly wrapped for up to 2 weeks and thaw slowly.
Q2: What’s the best make-ahead strategy for Marshmallow Snowman Treats?
A2: The most reliable approach is to melt and dip marshmallows in one session, refrigerate them overnight, then add decorative details like eyes, noses, and scarves closer to serving day. This breaks down the work and reduces stress right before events.
Q3: Can I batch cook or prepare multiple batches of Marshmallow Snowman Treats?
A3: Yes, batch prepping works well because ingredients store before assembly and dipping marshmallows in chocolate can be done efficiently in stages. I recommend making multiple batches spaced a few days apart to keep treats fresh and avoid fatigue.
Q4: How do I incorporate this Marshmallow Snowman Treats into my weekly meal plan?
A4: Treat Marshmallow Snowman Treats as your festive snack or dessert rotation regular. Slot them into midweek celebrations or weekend treats. Pair them with meals that use overlapping ingredients, like white chocolate or pretzels, to minimize shopping and prep.
Q5: Are there any ingredient swaps for dietary restrictions within this Marshmallow Snowman Treats?
A5: Definitely. Dairy-free white chocolate chips and vegan marshmallows can substitute easily. Adjust icing tubes or decorate with natural food coloring-based markers if allergies are a concern. Planning these swaps ahead ensures you’re set when assembling.
Q6: How can I avoid these Marshmallow Snowman Treats becoming sticky during storage?
A6: Store the treats in airtight containers layered between parchment paper in a cool, dry spot or fridge. Avoid direct contact with humidity to keep marshmallows firm. For events lasting several hours, keep treats chilled until serving.
Q7: What’s a strategic way to assemble these treats with kids involved?
A7: Prepare the core steps like dipping and cooling ahead, then invite kids to add eyes, noses, and scarves as a creative craft activity. This keeps the kitchen manageable and makes the Marshmallow Snowman Treats both a treat and a fun family project.
Planning Takeaways
Marshmallow Snowman Treats earned their place as a weekly staple in my holiday meal planning because they hit the sweet spot between festive fun and meal prep efficiency. These treats take advantage of ingredients that pull double duty, like marshmallows and pretzels used in other snack and dessert recipes. This flexibility lets me plan smart and always stay ahead of last-minute cravings.
Strategic Marshmallow Snowman Treats Tips:
- Prep the marshmallow dipping and base coating on a less busy day like Sunday for faster assembly through the week.
- Use batch prep and portion supplies in labeled bags or containers to keep your workspace clean and efficient.
- Plan your decorating step for the day of serving to maintain stunning presentation and optimal texture.
One planning variation I love is swapping candy corn noses for mini orange jelly beans, giving the Marshmallow Snowman Treats a playful twist. Another useful swap is using almond bark instead of white chocolate for those who prefer a less sweet option. Finally, integrating these treats with other snowman food crafts or winter marshmallow treats offers a broader holiday dessert table while still keeping prep intentional and manageable.
For busy cooks, fitting Marshmallow Snowman Treats into a strategic batch cooking or make-ahead rotation works best. It makes festive desserts approachable without panic or extra trips to the store. This recipe also pairs well with simple hot drinks or is a sweet post-dinner delight that keeps your prep time short.
Remember, you can adapt the steps and ingredient choices to your schedule and dietary needs without losing the joy or organization that comes with thoughtful meal planning. This recipe simplifies holiday week cooking and makes sure you have a festive, planned treat ready when you want it.
For planners looking for a cozy treat with practical prep, Marshmallow Snowman Treats are a decorated must-have. Pair your planning style with these delicious fall donut ideas for an even broader seasonal rotation. Together, these sweets bring joy without stress.
Ready to make your meal planning seamless and festive? Marshmallow Snowman Treats will help you get there, one thoughtful step at a time.
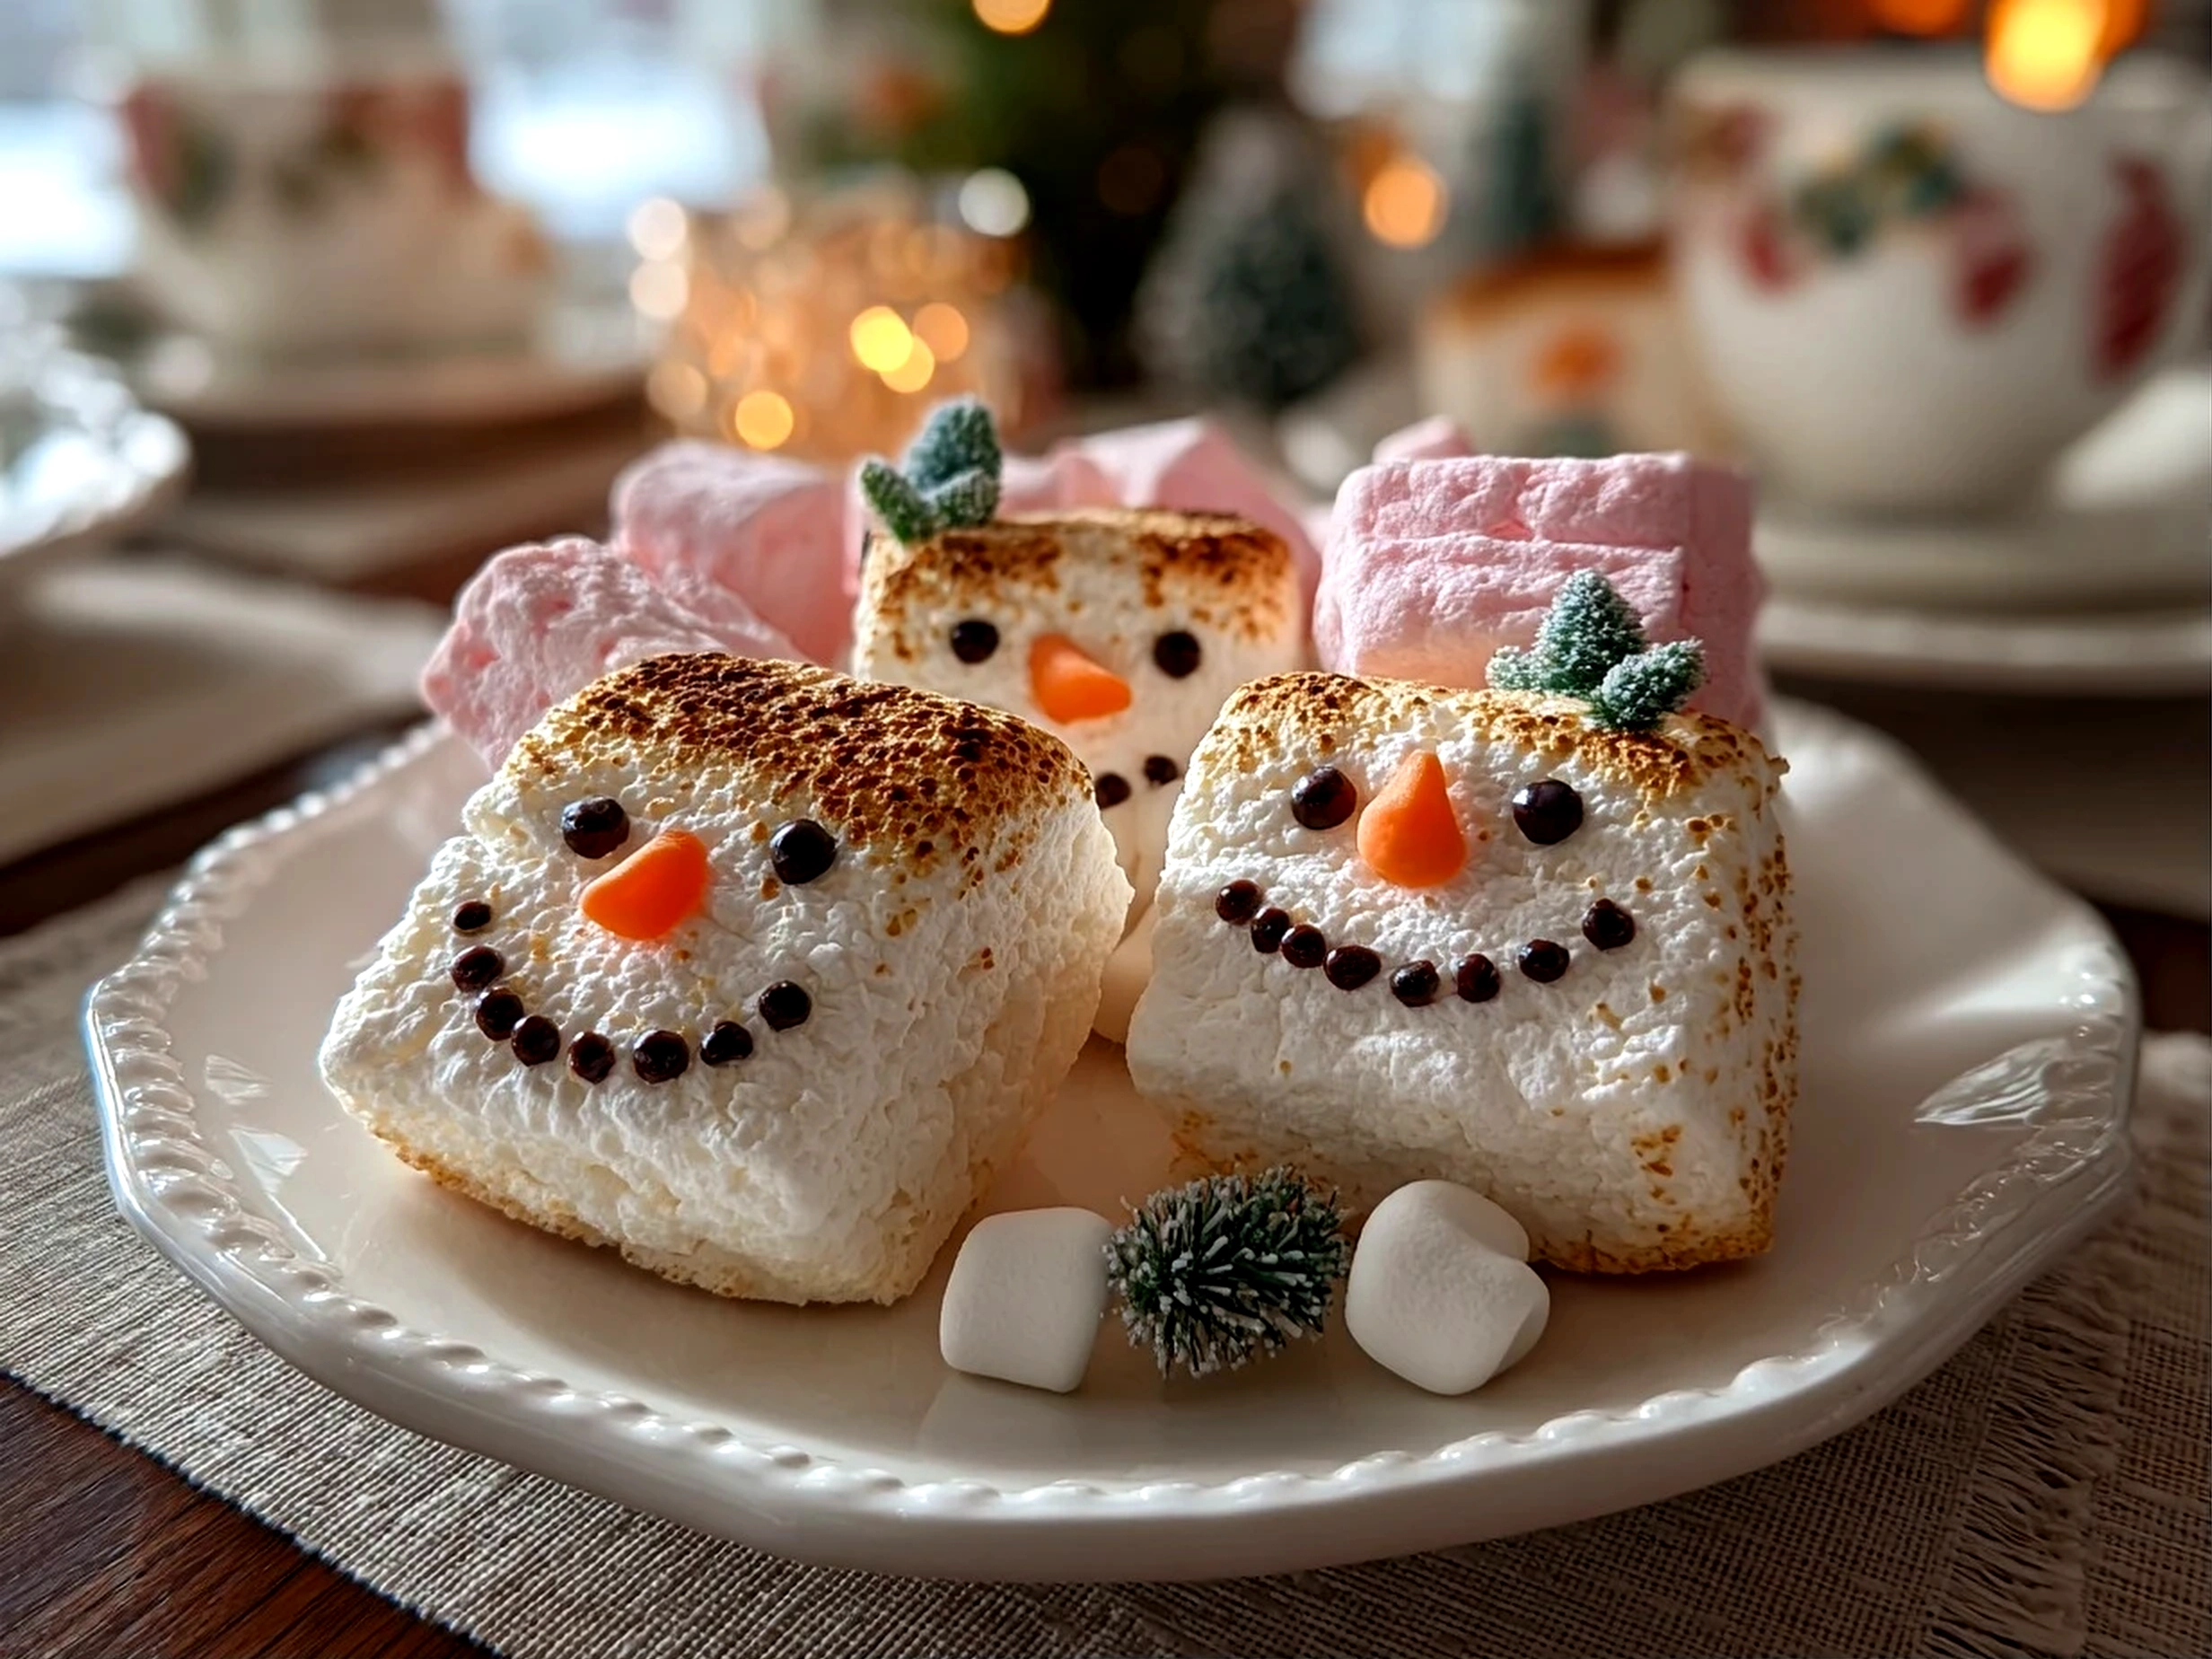
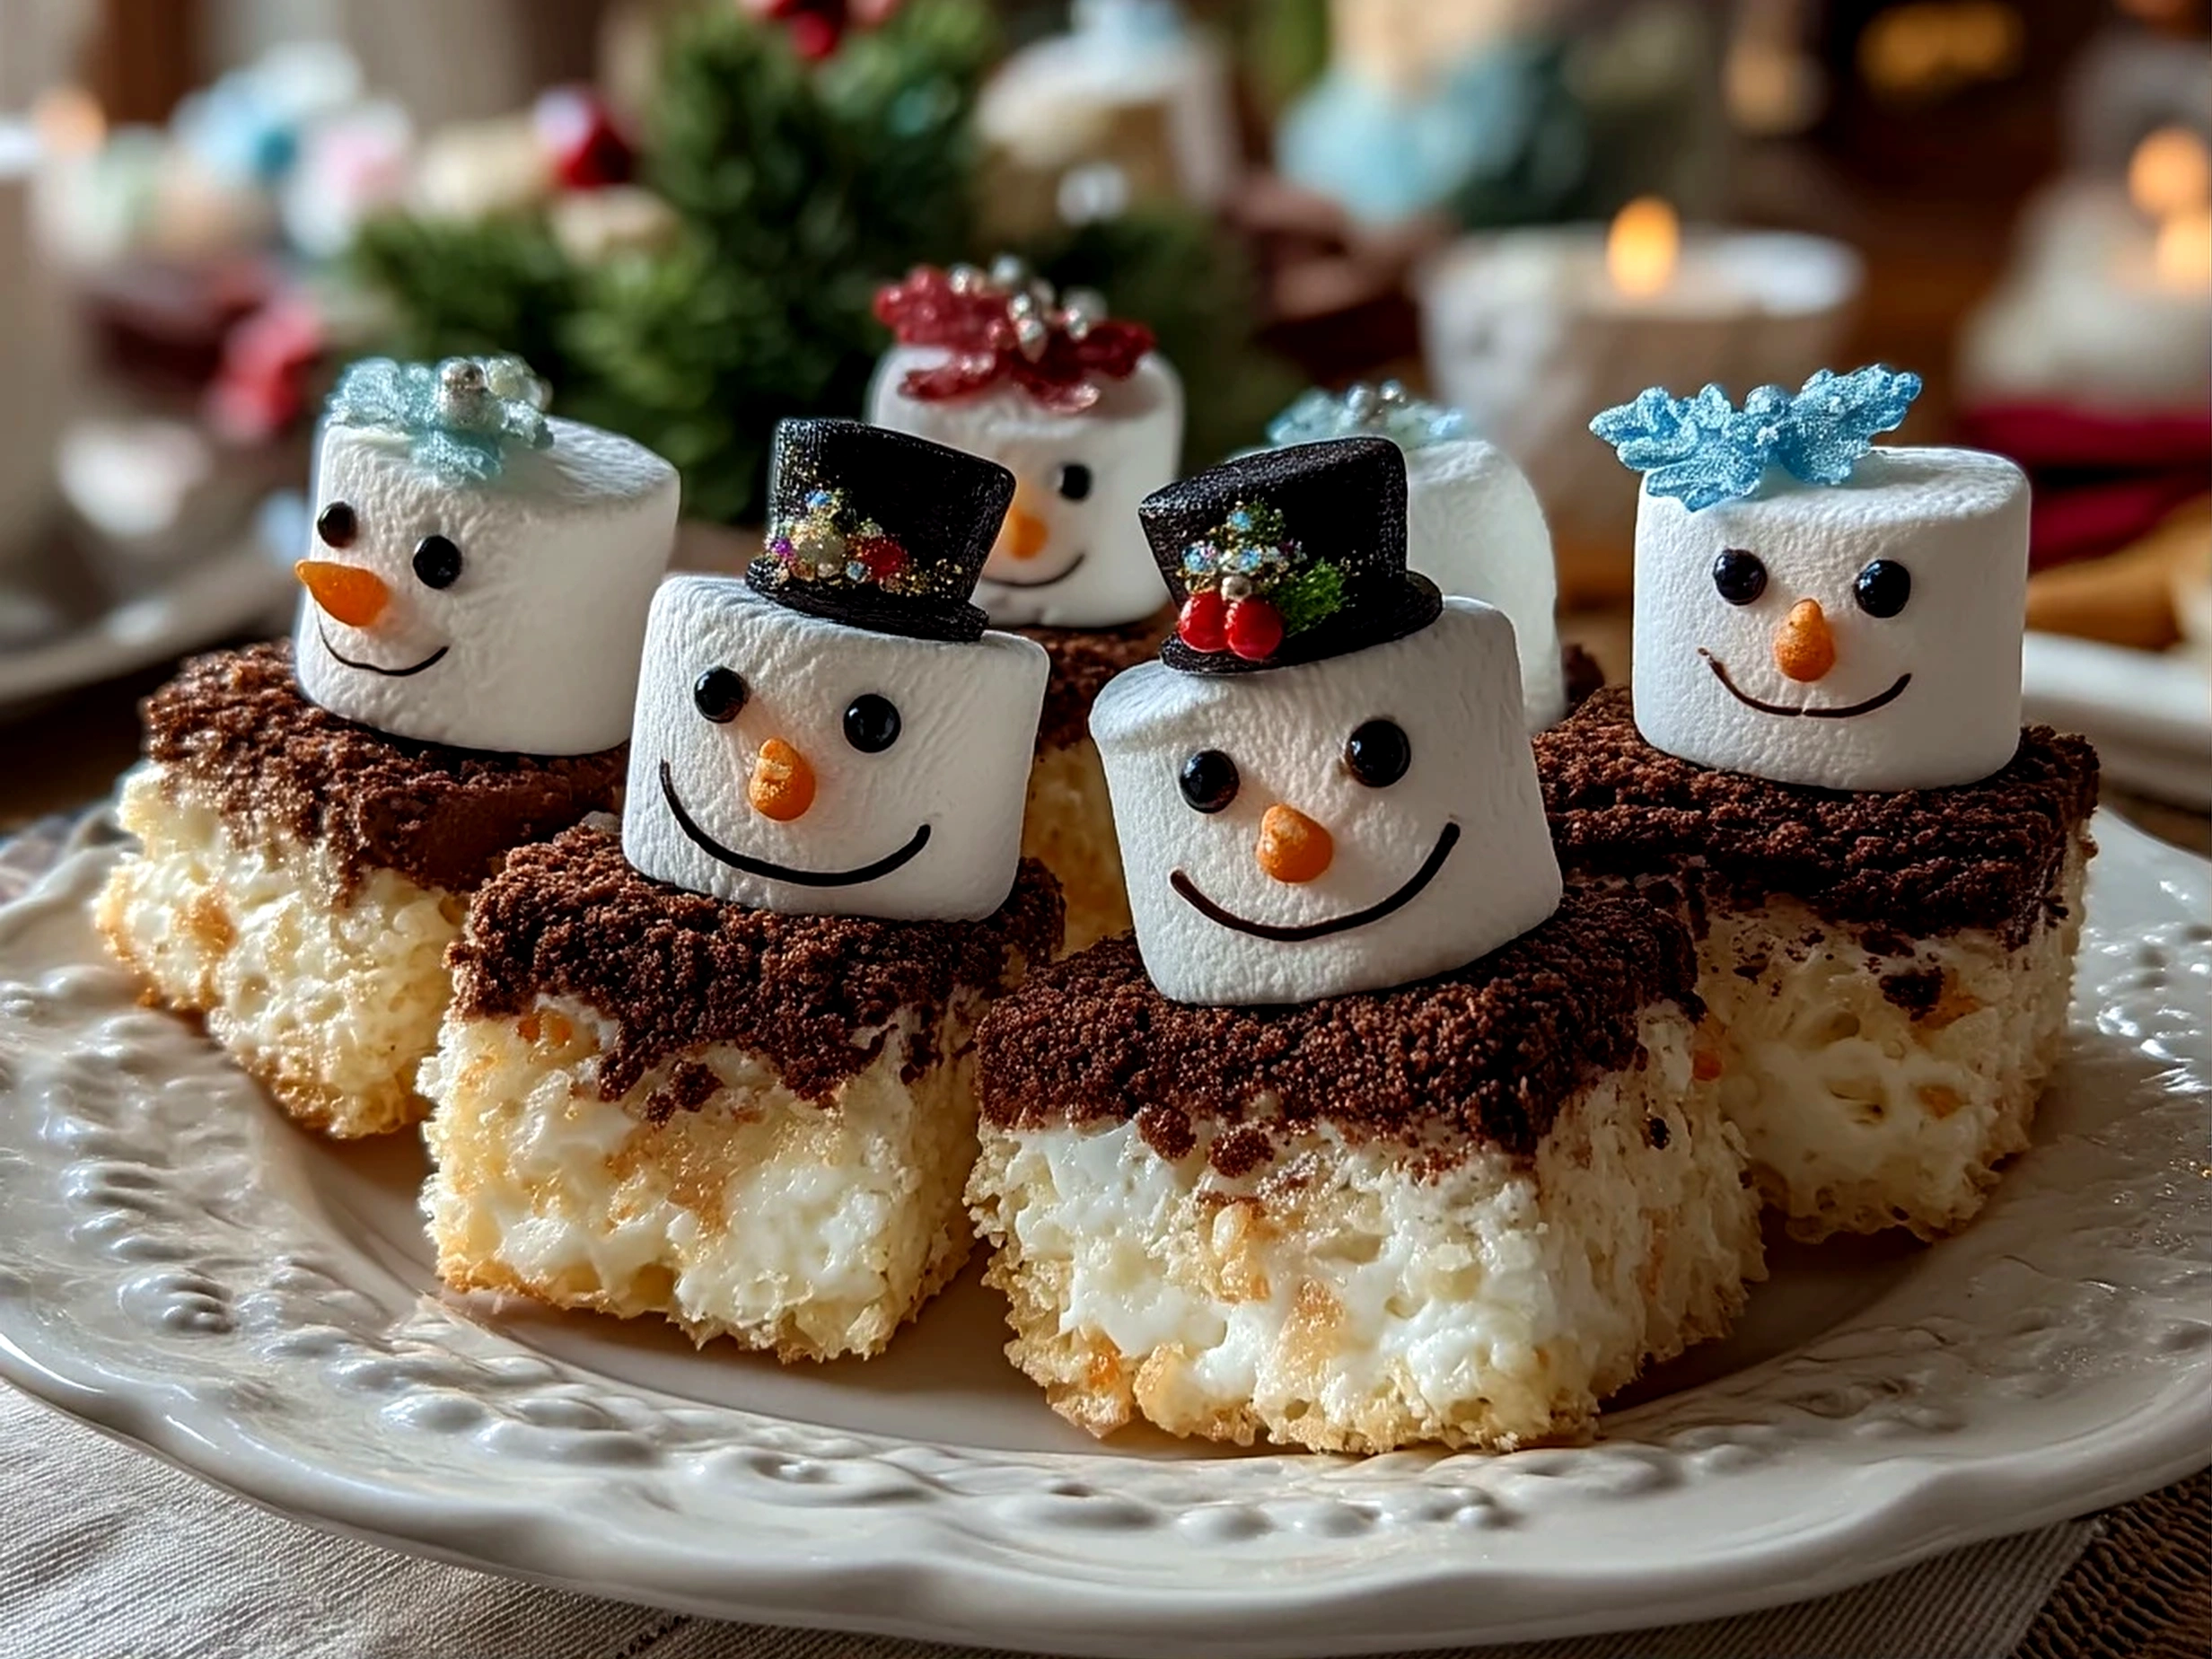
Marshmallow Snowman Treats
Delight in these adorable Marshmallow Snowman Treats, a fun and festive no-bake dessert perfect for winter celebrations and holiday parties.
- Prep Time: 10 minutes
- Cook Time: 0 minutes
- Total Time: 10 minutes
- Yield: 12 servings
- Category: Dessert
- Method: No-Cook
- Cuisine: American
Ingredients
- 12 large marshmallows
- 6 pretzel sticks
- 12 mini chocolate chips
- 12 small candy-coated chocolate pieces (for buttons)
- 12 orange mini candies (for noses)
- 1 cup white chocolate chips, melted
- 12 mini scarves made from fruit leather or fondant (optional)
- Edible black marker (optional)
Instructions
- Insert one pretzel stick halfway into each marshmallow to form the snowman’s body.
- Melt the white chocolate chips in a microwave-safe bowl, stirring every 30 seconds until smooth.
- Dip each marshmallow into the melted white chocolate, then place on parchment paper to cool and set.
- Use mini chocolate chips for eyes by gently pushing them into the marshmallow surface.
- Place an orange mini candy as the carrot nose just below the eyes.
- Attach small candy-coated chocolate pieces vertically to form buttons on the front of the marshmallow.
- Optionally, wrap a mini scarf around the pretzel stick just below the marshmallow head.
- Use an edible black marker to draw a smiling mouth if desired.
- Allow the treats to set completely before serving.
Notes
For an extra festive touch, sprinkle edible glitter on the white chocolate coating before it sets.