
When I first added Peanut Butter Pie to my meal planning rotation, it was a real breakthrough for tackling those unpredictable midweek dinners. One particularly chaotic week, I found myself scrambling late Tuesday afternoon with little time or energy to cook—typical for busy households. That’s when Peanut Butter Pie stepped in as a reliable, planned dessert that requires minimal prep but delivers big on satisfaction. The no-bake peanut butter pie crust means no extra oven time, which saved me at least 30 minutes. I used that extra time to prep lunches for the rest of the week, a win that reinforced how smart planning unlocks quiet efficiency.
What makes this Peanut Butter Pie a staple for me is how it fits seamlessly into an organized meal schedule. It’s simple but packed with creamy peanut butter filling that everyone loves. Planning ahead to whip it up on the weekend means I have a ready-to-go chocolate peanut butter dessert waiting for busy nights or weekend guests. Plus, it freezes well, which covers those unexpected “I need dessert now” moments.
If you’re a busy cook who wants delicious results without last-minute chaos, this Peanut Butter Pie recipe can be a strategic addition to your kitchen. It balances flavor with prep ease and offers a no-bake option that simplifies timing. Whether you’re batch cooking or plotting out meals for the week, this recipe holds its own as a reliable choice. For more efficient cooking inspiration, you might like my garlic butter chicken skillet or a classic brown butter cheesecake as well.
Let’s walk through everything that makes this Peanut Butter Pie a consistent crowd-pleaser, and how you can fold it effortlessly into your weekly meal plans.
Your Shopping List:
Here’s what you’ll need for your Peanut Butter Pie, organized for smooth shopping and prep:
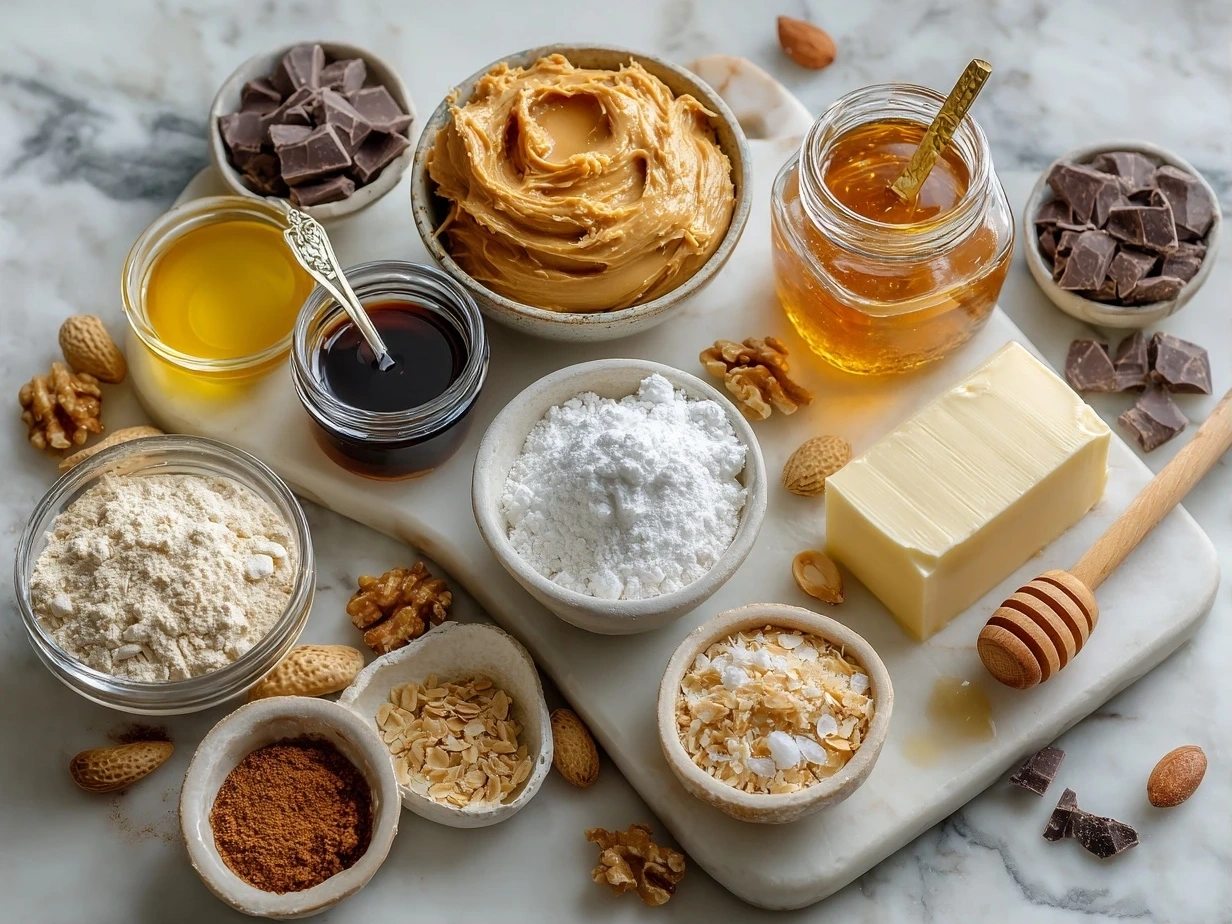
- 8 ounces cream cheese, softened – I choose this because it stores well and contributes to that creamy peanut butter pie filling I love.
- 1 cup creamy peanut butter – The base of our peanut butter pie, this ingredient doubles for snacks or sandwiches during the week.
- 1 cup powdered sugar – Sweetens our filling without any grit.
- 1 teaspoon vanilla extract – Adds depth to the flavor without overwhelming the peanut butter.
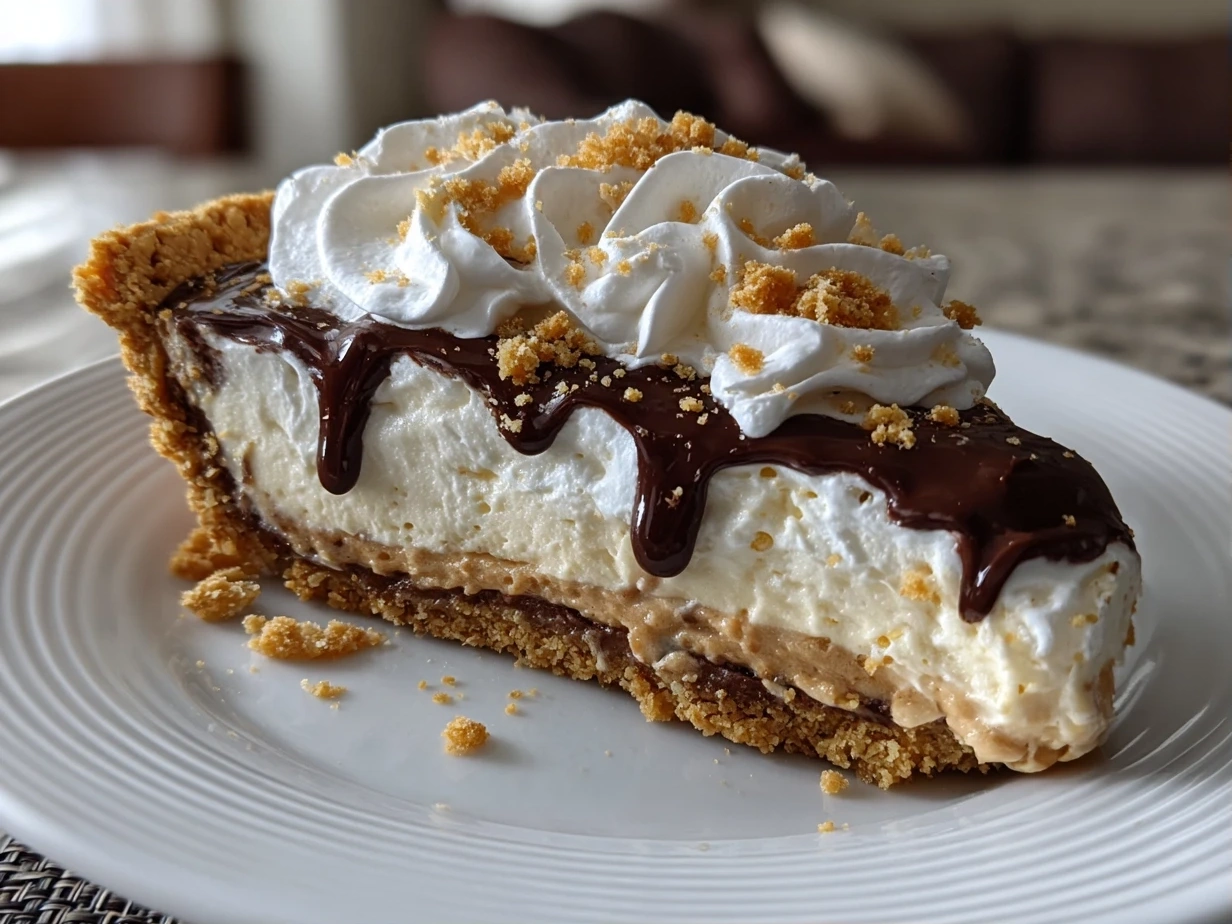
- 9-inch chocolate cookie crust or graham cracker crust – For my peanut butter pie crust, a pre-made crust saves time and pairs perfectly with the filling.
- 1 cup heavy cream, cold – Whipped to fold into the filling, giving it that light, airy texture.
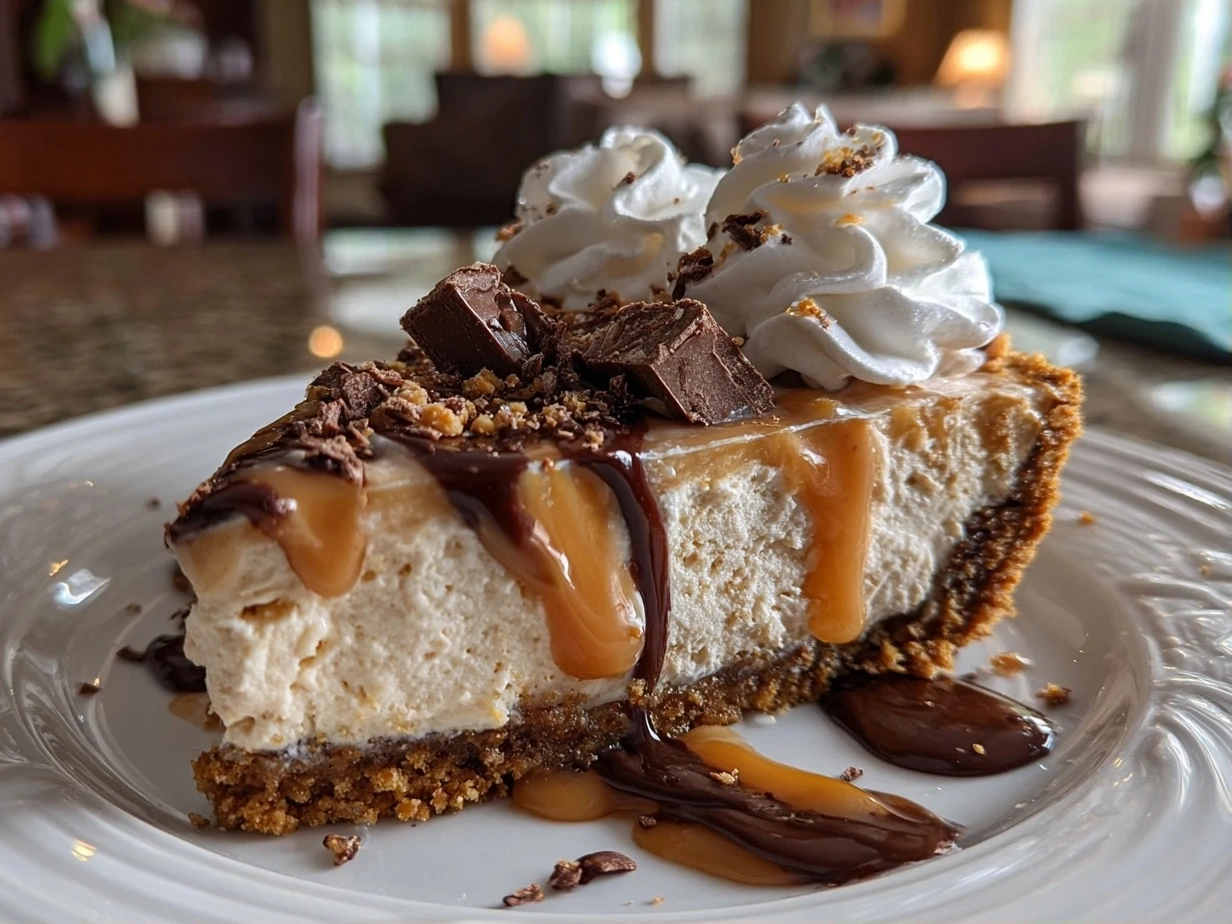
- Chocolate shavings or peanut butter cups, optional garnish – A small touch to turn your peanut butter pie into a chocolate peanut butter dessert feast.
Planning tip: Group these together to pick up in one spot at the store, especially cream cheese, heavy cream, and peanut butter. If you batch prep, these ingredients can also serve other meals or snacks—double win for weekly efficiency.
When buying your peanut butter, I recommend creamy for that smooth filling. You can buy heavy cream pre-whipped or use a mixer to speed things along. The crust can also be prepped ahead or store-bought to save oven time. These choices make sure that your peanut butter pie fits neatly into busy weeks without extra stress.
Storing ingredients like cream cheese and peanut butter in your fridge or pantry makes multiple weekly uses easy, as this base works well in other recipes with similar flavor profiles.
The Game Plan:
Here’s my step-by-step system for crafting the perfect Peanut Butter Pie with confidence and calm.
- Prep Your Peanut Butter Pie Crust First:
If you’re using a store-bought crust, have it ready. If making from scratch, combine chocolate cookie crumbs and melted butter, then press firmly into the pie dish. Refrigerate to set. This is a great task to check off while prepping other meals. - Make the Creamy Peanut Butter Filling:
In a large bowl, beat softened cream cheese until smooth. Add peanut butter, powdered sugar, and vanilla extract. Mix until fully combined. This creamy peanut butter filling is the heart of the pie—smooth and luscious. - Whip the Heavy Cream:
Cold heavy cream whips best. Whip until stiff peaks form. This adds lightness to your peanut butter pie, balancing its richness. - Fold Whipped Cream into Peanut Butter Mixture:
Gently fold the whipped cream into your peanut butter filling to keep it airy. This step requires a careful touch but pays off with a fluffier peanut butter pie. - Fill the Pie Crust:
Spoon the peanut butter mixture into your prepared crust, smoothing out the top evenly. - Chill the Pie:
Refrigerate for at least 4 hours, preferably longer. This helps the peanut butter pie set fully, making slicing clean and easy.
Planning checkpoint: At this point, your Peanut Butter Pie should be firm but creamy, ready for garnish or serving.
If you want to prep ahead, this peanut butter pie freezes well. Simply wrap tightly and freeze for up to 2 months. Thaw overnight in the fridge before serving.
While your peanut butter pie chills, it’s an ideal moment to prep other meals, like garlic butter chicken thighs, maximizing your focused kitchen time.
This peanut butter pie plan typically takes 15 minutes active prep and 4+ hours chilling—perfect for weekend cooking sessions that feed you through the week.
Smart Serving & Meal Planning Ideas:
This Peanut Butter Pie fits beautifully into any weekly meal schedule. I usually plan it midweek as a sweet pick-me-up.
Pair it with fresh fruit or a simple side salad for a balanced dessert course after dinner. Since the peanut butter pie crust is chocolate-based, serving it alongside a low-effort vanilla ice cream or a batch-cooked fruit compote works well.
Planning variation: Scale the recipe up for gatherings or halve it for smaller households—this peanut butter pie is flexible and forgiving.
Leftovers? They often become a quick grab-and-go snack or an impromptu dessert for lunchboxes. You can also spoon some into jars for a portable treat.
This peanut butter pie is great for occasions like casual dinners, potlucks, or when you want a dessert that doesn’t require extra stove or oven time. Its no-bake nature makes it a steady weekly staple and a rotation regular for busy cooks.
For a chocolate peanut butter dessert alternative, check out this no-bake chocolate peanut butter pie with slightly different techniques and toppings.
Planning & Prep Questions
How far ahead can I prep this Peanut Butter Pie?
You can make your peanut butter pie up to 2 days ahead without sacrificing quality. Keep it covered in the fridge. Freezing it extends that even longer, a perfect plan for busy weeks with batch cooking.
What’s the best make-ahead strategy for Peanut Butter Pie?
Make the filling and assemble the pie crust the day before serving. Let chilling time do the rest. That way, you use your weekend meal prep efficiently and have a dessert that’s ready when the week gets hectic.
Can I use a different crust for my peanut butter pie?
Absolutely. While I recommend a chocolate cookie crust for flavor balance, graham cracker crust works too if you prefer something lighter. Both options can be made ahead or bought premade for ease.
How do I incorporate this Peanut Butter Pie into my weekly meal plan?
Plan it as a dessert midweek or weekend treat. You can also pair it with a simple meal and save dessert for the next day. This flexibility makes it a reliable sweet finish without last-minute stress. Pair it with other planned meals like the Brown Butter Cheesecake for dessert variety.
Can I double the recipe?
Yes. The peanut butter pie scales well. Just be sure to increase chilling time proportionally and use a larger pan if needed.
What if I want to add chocolate toppings?
Chocolate shavings or chopped peanut butter cups make great toppings, turning this peanut butter pie into a chocolate peanut butter dessert. I link to recipes like Best Chocolate Peanut Butter Pie by The Pioneer Woman for inspiration.
Is this peanut butter pie suitable for freezer storage?
Yes, wrap tightly to avoid freezer burn. Thaw fully in the fridge before serving for best texture.
Planning Takeaways
This Peanut Butter Pie holds a special place in my meal planning because it balances treat-worthy flavor with ease and reliability. Its no-bake peanut butter pie crust and creamy peanut butter filling require minimal hands-on time and fit perfectly into my weekend prep sessions.
Strategic Peanut Butter Pie Tips:
– Make the pie crust ahead or buy pre-made for maximum time saving.
– Whip and fold the filling in batches if doubling or tripling the recipe.
– Keep chilling times consistent to ensure perfect texture every time.
I’ve adapted this peanut butter pie into meal plans with variations: simple topping swaps, switching crust types, and using it alongside savory meals to balance the week. When time is tight, doubling the recipe helps me prepare desserts for two weeks in one go.
Planning ahead for peanut butter pie means fewer last-minute decisions and guaranteed dessert success. It’s an easy way to keep dessert in your rotation without extra oven time or fuss. If you want a smart pairing, check out the No-Bake Peanut Butter Pie recipe at The BakerMama for subtle twists.
For busy cooks who want straightforward, delicious meals fit for real life, this Peanut Butter Pie is a winner. Use these strategies, adapt to your schedule, and enjoy sweet relief at dessert time.
If you want more planned dessert ideas or main dishes that fit meal prep, visit my other favorites linked above. You’re set up for stress-free, tasty weeks ahead.
Peanut Butter Pie
This creamy and indulgent Peanut Butter Pie combines a rich peanut butter filling with a crunchy graham cracker crust, perfect for any dessert occasion.
- Prep Time: 15 minutes
- Cook Time: 0 minutes
- Total Time: 4 hours 15 minutes
- Yield: 8 servings
- Category: Dessert
- Method: No-Cook
- Cuisine: American
Ingredients
- 1 1/2 cups graham cracker crumbs
- 1/3 cup melted butter
- 1/4 cup granulated sugar
- 1 cup creamy peanut butter
- 8 oz cream cheese, softened
- 1 cup powdered sugar
- 1 1/2 cups heavy cream
- 1 teaspoon vanilla extract
- Chopped peanuts or chocolate shavings (optional, for garnish)
Instructions
- In a medium bowl, mix graham cracker crumbs, melted butter, and granulated sugar until combined.
- Press the mixture evenly into the bottom of a 9-inch pie pan to form the crust. Chill in the refrigerator for 15 minutes.
- In a large bowl, beat the cream cheese and peanut butter together until smooth and creamy.
- Add powdered sugar and vanilla extract, mixing until fully incorporated.
- In a separate chilled bowl, whip the heavy cream until stiff peaks form.
- Gently fold the whipped cream into the peanut butter mixture until fully combined.
- Pour the filling into the prepared crust and spread evenly.
- Refrigerate the pie for at least 4 hours or until firm.
- Before serving, garnish with chopped peanuts or chocolate shavings if desired.
Notes
For an extra touch, drizzle melted chocolate over the top before chilling or serve with fresh berries.